Panels & Lining
 When I purchased the van it was already ply-lined. Some of the panels were re-used, some removed, some replaced.
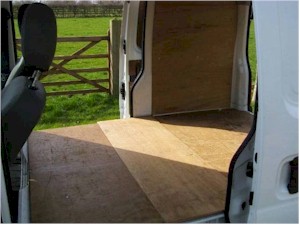
The floor ply was removed and replaced with new as the original sections no longer fitted with the false floor removed. Once some of the door panels were covered with the lining material, they became too thick to clip back into place. These panels had to be screwed back onto the door with self-tappers.
The lining material or carpet and glue was purchased from an ebay store Road-Trippin. Basically all the ply wall panels, and any exposed white metal of the van were covered with this carpet. Firstly it gives a warmer feel on contact than the metal or wood and adds some insulation when it is cold outside, secondly it starts to remove the "white van" look when sitting inside the van and thirdly it hides some of the dents and scratches the van is bound to have picked up in it's former life!
Tip!
Make sure the glue you use to stick the lining carpet to the walls or roof is high temperature. The inside of the van gets very hot when left in the sun with the windows closed. Low temperature glues will melt in this heat. Lining will fall off, and then re-stick when the temperature goes back down! All your hard work can end up in a sticky heap on the floor!
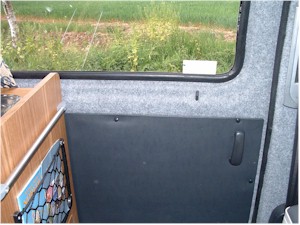
 Here is a view of the door once it has been covered with the lining carpet. The carpet is relatively flexible, but because of all the ridges on the window panel, it takes quite a bit of time and concentration to get it to fit all the shapes. Practice with some off-cuts with a little glue to get the hang of it.
In the end, on the doors I ended up keeping the original door panel with some insulation behind. Because the lining material goes behind the panel, the original clips no longer work. However, when the van was originally ply-lined, self-tapping screws were used to hold the ply in place. I used the same holes to hold the original panel on. I managed to find some black screw covers in a DIY shop. These cover the self-tappers and a neat finish. The door ends up grey, charcoal and black - nice.
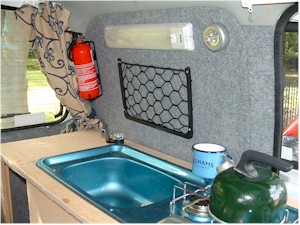
 Here you can see the walls now that they are lined. The arched panel was once of the original ply sections in the van. The nice curve at the top settles nicely into the rear panel hollow. The panel is only held to the van wall with 2 large self-tapping screws. The panel is pushed hard in at the center (vertically). This takes quite a bit of effort as the van bows inwards towards the roof. The floor holds the bottom in place. The back of the panel is coated with the silver bubble-wrap insulation material. Keep hold of any off-cuts of the carpet material - you never know what you need to cover small areas if visible metal or wood. The joins are hardly noticeable due to the fluffy texture.
Tip!
Beware when fixing the panel to the van wall that you don't drill or screw through the thin side panels. Make sure you screw through one of the internal strengthening beams or the main pillars.
Pull the door rubbers away from the metal. Glue the carpet over the edge, trim to the edge of the metal, the then put the rubbers back in making sure that they go over the carpet material. This gives a lovely finish as the edge of the material is actually hidden under the rubber seal. Also, tuck the carpet under the roof lining. You might need to pop out the little button thing that holds it in place, but again, you get a great finish as the roof lining sits over the top of the carpet.