The Roof
Big Update - Raising the roof!
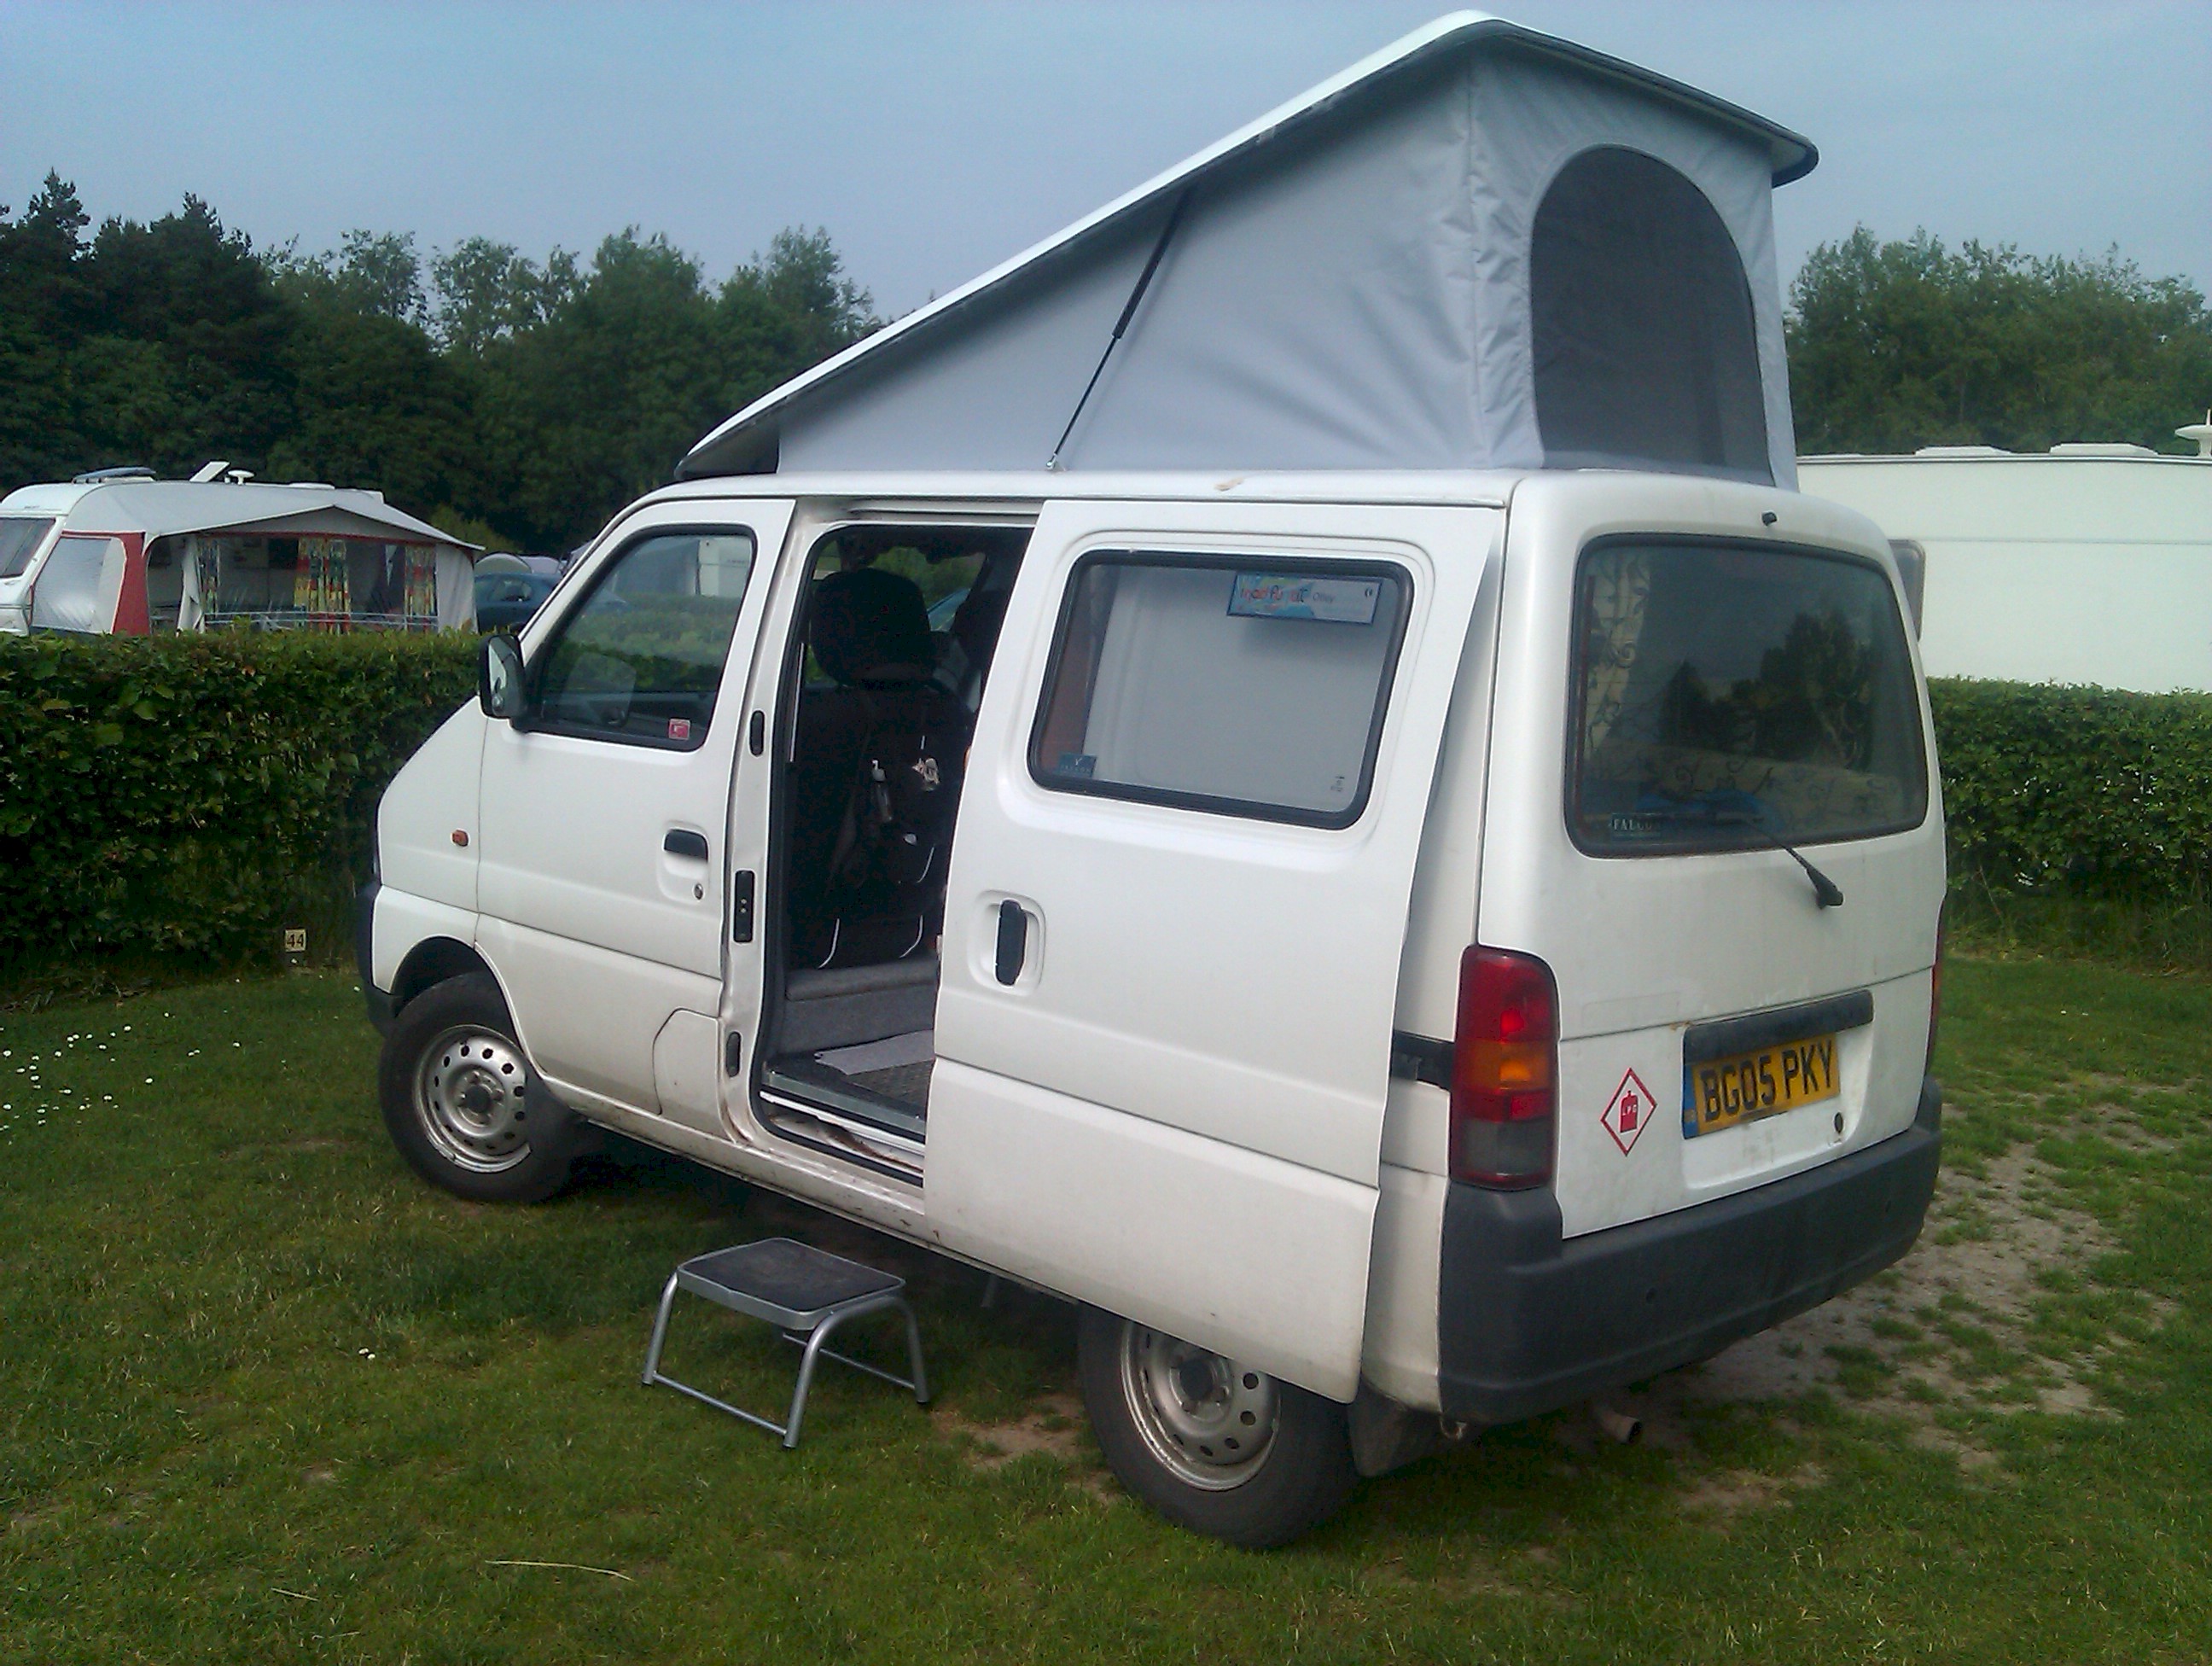 This year I was lucky to be able to afford a "pop-top" or "elevating roof" for Tin Tent 2. They are not cheap, but I think they make the world of difference to a Carry or other small/micro campervan. I will add a new section on this site with more photos once I've tidied the van up a bit.
I'm about 5'9". OK, because of the stepped floor in the Carry, I can't technically stand completely upright in the van. However, in two places along the length (middle and back) I can stand upright with my head tilted slightly. My point would be - how often do you need to stand completely straight upright when camping?!
Simple tasks such as getting dressed (in a low headroom van, you find yourself having to tuck everything in once you step out of the van as nothing stays tucked in properly if you get dressed bent-over or laying down!), making the bed - I can now throw the sheet/sleeping bag out without having to stoop over it or sit on the end you are trying to position.
Drivelodge Motorhomes
Warings Works
Crosshills
Keighley
West Yorkshire
BD20 7RS
Tel: 01535 637777
The roof was purchased and installed by Drivelodge Motorhomes. Drivelodge install elevating roofs in all sorts of vans - and I think they can even design and build custom roofs. I had a fantastic service with them. Based in West Yorkshire, I drove the van up and left it with them for two and a half days. (They quoted 3 days, but finished early). I now realise what a hard task I asked of them as they are probably used to installing roofs in empty vans. They had to work around all my fixtures and fittings, and even dismantled my sunroof for me to try and sell on Ebay. They moved my light, and alarm senor all to accommodate the new roof. I'm forever grateful for that.
The roof goes in with a strengthening frame where the "hole" is. This is all cut into the original roof lining. I can only say it was a truly professional job from start to finish. The "tent" is made from a nylon "tear-free", anti-rotting material so should be good or 20 years or so I think.
I'll write more descriptions once I create the new "Raising the Roof" section with photos later. Just wanted to update you all and say a big thanks to all at DriveLodge.
 I had originally planned to have a lifting roof installed. This would have cost about £1,500 as the parts would have to be made specifically for the van. They no longer stocked the roof, but it could have been created. I'm afraid that the funds for the van ran out before it was time to decide, so my mind was made up for me!
Sticking with the original roof, I was able to put some of the silver bubble-wrap insulation between the roof and the roof lining. To do this, I had to pop out the button type things that hold the lining up, but also separate the lining from the roof as Suzuki had used three lines of glue to hold the two parts together. Luckily they had "missed" one line of glue. I levered the lining down from the roof by inserting a wooden baton. The lining material bends quite well, but creases started to appear if I forced it too much. Luckily the wrinkles vanish again if they don't get too bad!
Obviously the sun roof was put into the roof (see windows section), and the cargo net attached inside (see furniture & storage).
The lining material had several scrapes where wood (or something) had been loaded into the van. I found that a stiff hand brush removed these scrapes (or at least made the surrounding fluffy enough to hide them). It would appear that the former owners were non-smokers. However, roof lining material can be re-coloured or replaced if the scrapes are too bad.